This blog has moved! Click here for the new blog.
Showing posts with label 15:60. Show all posts

Saturday, September 1, 2012

Ultimate Batwings

At the end of the last 15:60 day I was tired, hungry and thirsty, but... very content! I really wasn't sure if I'd make it after spending 5 hours on the Chevron top. It was 3 PM and I still had to do the cutting, go to the store because I didn't have enough fabric and on top of that the pattern instructions were written in Japanese... But I didn't cave, my last project had to be this dress. Keep calm and sew on. In the end I finished it at 8 PM, spending only 4 hours working on it including cutting.


It's Dress no. 7 from Drape Drape 2. The one that was the inspiration for my folded miniskirt, after spotting it on Karin. The ever generous Tj sent me the pattern after making her fantastic version. I was so excited to finally have this pattern! I had this knit fabric, a remnant which said 200x155 cm, the exact amount needed for the pattern. Except that it was 2 meters wide instead of long. Argh! More reason to dislike that fabric store. So that meant I had to go out to get more fabric, and I had to cut the front piece in two. The sewing was pretty straightforward, and I was impressed with my serger being able to handle four layers of this medium weight knit.


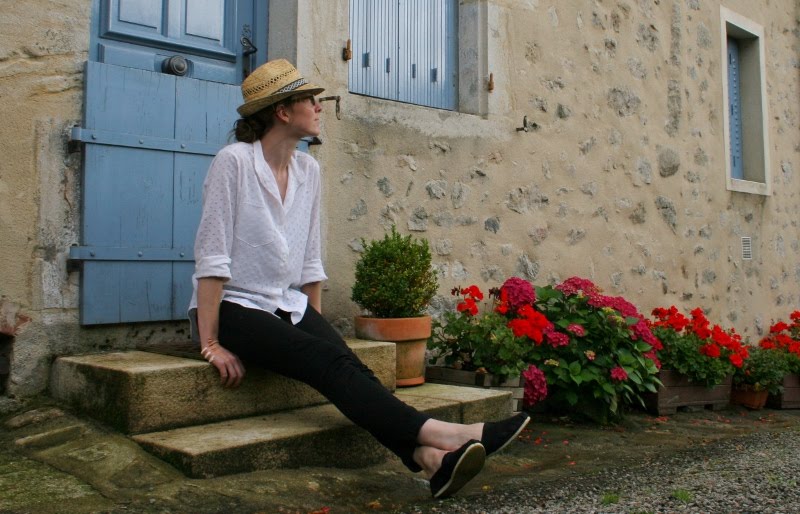
It's still a bit too warm to wear this dress but I already know it'll be one of my favourites. I love wearing mini skirts in winter. And it's totally my style, a bit quirky but not just plain weird. I have to agree with Tj, it's a bit of a waste of fabric. But look at those batwings! They might even be big enough to fly. And if that doesn't work out, at least your skirt won't get pulled up if you reach for something.

And so this challenge has come to an end! It was fun to completely focus on sewing for two months. I was finally able to get most of the ideas floating in my head out there in reality, and reduce my stash at the same time. I'm also glad it's over though, it has left my sewing mojo at a very low level after this marathon. Plus I'm afraid I have become a bit of a hermit spending all my free time sewing and blogging. I may even have lost my mind a little...


(15:60 #15!)

Thursday, August 30, 2012

Chevron Top

Did you know that a chevron is an inverted V-shape? And that it is also a term used in geology? And if that wasn't cool enough, did you know it's also a bone found in dinosaurs and kangaroos? I bet you didn't! It's got to be the most awesome pattern there is, right? What I made is actually not a chevron top; it's an inverted chevron. So that means it's an inverted inverted V-shape, i.e. a V-shape. But chevron sounds better, doesn't it? Or inverted chevron if you will.


I made this top on the last day of the challenge. I thought I'd do this one first, being the smaller project. However, it turned out to be the most time consuming! It took me 5 hours, without the cutting. My serger pulled some tricks on me so I had to do the neckline twice. I almost got really frustrated, but I quickly realized that I had to remain calm if I wanted to finish two pieces in one day. You just can't really pay attention if you're in a hurry, and that's when things are bound to go wrong.


As you can see, to create the V I cut the front of the shirt on the bias and connected them at the centre front. After reading some posts from others about sewing knits, I decided not to serge the whole thing, only the neck and armhole bindings. Knit seams don't need the finish, and the seam is less wobbly when you sew it with a straight stitch. It's a loose shirt, so I don't need the seams to stretch anyway. I like it this way, you need to think about the function of each seam and decide which approach is best.


I'm really pleased with how it turned out, it's super comfortable and simple but not boring. My goal for every garment I make, I guess :) The bias bindings worked out well, I used the Renfrew method. In fact, the whole pattern is again derived from the Renfrew. Matching patterns is not my favourite thing though. Allright, I really don't like it. Matching fabric is a pain if you ask me. It needs at least three attempts if you don't have a walking foot. But the result is very pretty, and that's what we're going for, right?

(15:60 #14)

Monday, August 27, 2012

Sewer's supplies #2

Nr 2, you might think, when was nr. 1? Well, back in April 2011. This was meant to be a series of posts. And that is also how long I've been wanting to make a ham and sausage. And so I finally did, because they are perfect for using scraps. I had to select on weight of fabric so they're not exceptionally pretty.


I used the tutorial Tilly just posted. I don't know if they have the right size, I don't have a printer so I transferred measurements from my iPad to paper. The sausage seems about right, the ham is on the small side. I'm not sure the pattern is right, even if you made it bigger it wouldn't be as rectangular as pictured in the tutorial. I stuffed them with the synthetic contents of a pillow. So, not much else to say about these, let's get back to work! 2 days, 2 projects...

(15:60 #13)

Saturday, August 25, 2012

On Pouches (And Keeping Resolutions)

Eeek! I just realised that I have 2 days less than I thought to finish the challenge, because I started it on the 29th and not the 31st. Luckily, I still had some small projects on my list. First up is the Current Knitting Project Bag. Stef grew a bit tired of the wool and needles lying around the house. I wanted to keep them at hand because if I put it away, I'll never finish my summer sweater. So I figured I could make a small bag that could keep my current project together. Another benefit is that it's easy to take it with you when you travel, instead of just stuffing it in your bag and the whole thing unraveling or tangling up. The fabric is a remnant of IKEA upholstery fabric. It's quite heavy, so no chance of needles poking through.


The other quick project has something to do with my New Years resolution! Starting the 4th of September, I'll be following a pattern drafting course! It's an elaborate one, that will continue until May. It's actually the first year of a four year dressmakers training. I'm not going to do the whole thing, just the first year. I'm so excited to start learning how to draft patterns in a professional way! I'm hoping it will really enhance my designs. For this course, I needed some supplies like a pencil, ruler, eraser and a file with squared paper. I wanted to make a pouch for the utensils. Stef suggested I add eyelets so I can keep the pouch and file together at all times. Smart, right?


The brown fabric is the oldest remnant I have. It was used for the school play in my junior year, we were expected to sew our own clothes for it. My grandmother helped me to sew a simple jacket and pants. In fact, these were sewn on the machine I'm using right now. I was so impressed, I still have clear memories of the process. This is what sparked my sewing interest! I thought it was only logical to use this fabric for something that will take this 'hobby' to the next level. And ofcourse I'll share some of the insights here with you. I can't wait!

(15:60 #11 & 12)

Wednesday, August 22, 2012

End of Summer Dress

It was hardly worth it: we were about to have 5 days of very nice/hot weather (around 30C/86F) and on the first day, I realized I really wanted to have a light, fluttery dress that would come closest to wearing nothing without revealing everything. And I knew what fabric I wanted to use. I had thought of saving it for next year, but I really wanted to use it now. I tossed the longsleeve I was making aside, and started drafting. Ideas for garments don't come suddenly, they sort of simmer in my head for a while until the picture is complete. This was the basis for the picture of this dress.


It's the same fabric I used for my first loopscarf, I'm guessing a light cotton. I had heard about the stretching of fabric at the place where it's cut on the bias, and as you can see now have first hand experience with this phenomenon. Cutting on the bias is unavoidable with circle skirts, and this fabric is one that you should let hang for a day before you hem, apparently. Or should you always hang circle skirts before hemming? Anyway, the uneven (but symmetrical) hem is not something that bothers me a great deal, but the idea of redoing it is not off the table yet.


I was afraid I'd have to line it, but fortunately it's not that transparent. To keep it as light and airy as possible I used my pinking shears as a seam finish. I didn't think of using my serger until after finishing! I made a muslin of the bodice to see if my pattern would work. Then I read some things about darts and tried to figure out how to incorporate them into the pattern. I wanted it to be sort of fitted from the bust down so it would smoothly continue into the half circle skirt. I figured I needed two vertical darts to get a nice fit. I didn't seem to need bust or armhole darts at that point. Maybe because the unbleached cotton I used is everything but fluttery and I didn't make a complete bodice muslin.


I was a bit surprised at my own math skills when it turned out the bodice and skirt lined up perfectly! It shouldn't be that complicated, but when you don't have a tutorial there's always the chance you're overlooking something. When I had sewn up the complete dress, it turned out I did need armhole darts. So now there's four darts in the bodice, and it fits really well around the armholes and bust. The only thing is that the waistline should have been, well, at my waist. When I had just sewn it, it was half an inch below and I decided I could live with that. Partly because I didn't want to redo the blind zipper :). But now it has stretched to an inch. Maybe I could make some beltloops and use a belt to keep it at my waist. Those are the cons of fluttery fabric, I guess! What do you think, would you shorten the bodice and redo zipper?


This is the bodice pattern I ended up with, including armhole darts and a shortened waist for next time. I am quite happy with the dress, despite the shortcomings. It served it's purpose as a fluttery summer dress for what were probably the last two days of real summer. But I've already spied a dark green knit fabric to make a cardigan that goes with it so I can keep wearing it!

(15:60 #10 - 5 projects, 10 days to go!)

Wednesday, August 15, 2012

Take 2: Circle skirt

After taking apart the failed maxi skirt I figured the colour wasn't really my thing either. So I dyed it Ocean Blue (Dylon machine wash), with an interesting result. It turns out the threads on the grain are synthetic, and the threads on the cross grain are natural. The natural ones make up the colour, but the synthetic ones underneath give the skirt a bit of a shine. Plus the synthetic fibers makes the fabric less prone to crease. And I figured out how to use this fabric: in a circle skirt!
I have no idea why I never made one before. It's so easy, the overall fit is great and it's truly the best summer skirt; light and breezy. It's actually a half circle skirt. I used the SnugBugs circle skirt calculator to draw the pattern, and the Vivat Veritas' Scallop Waist Skirt Tutorial on how to put it together. I actually started this because I'm going to make a circle skirt for a friend and I wanted to try it out on myself first.


The obligatory twirling photo shows the light white cotton I used as lining. I installed an invisible zipper which had to be truly invisible because it's cream coloured. A good way to force yourself to be precise :) But it worked out well, I think this is the best one I've done so far. Except that I now forgot to check if the waistband lines up at the zipper. Ah well. To close the top I used a hook and eye (which have apparently come loose again, I discovered through this photo). I inserted them between the waistband layers, like Karen I used to just sew them on the inside until she mentioned inserting them. I took no shortcuts and finished every seam. A nice finish is a big part of what constitutes the feeling you have about something you just made. So no, past me, you can't just do whatever you like, following professional sewing rules is a good thing. They're not there to take the fun out of sewing, they make your garment better and more durable.


I absolutely love the outcome! All in all I made this in an afternoon, including drawing and cutting. The thing I love most about this skirt: it fits seamlessly (hehe) in my wardrobe! There's so many pieces I can combine it with because it's plain and basic. Below are the cool top, a thrifted H&M shirt, the basic floral top and the batwings with buttons sweater. I bet it looks great with the perfect shirt, too. I think I like the first one the most, but I also like the third one because I've made that top a long time ago.


Unfortunately it has fallen victim to my best trait twice already. This time it was mayonnaise and banana milkshake. Sigh.

(15:60 #9)

Sunday, August 12, 2012

Wear More Pencil Skirts

After all of your incredibly nice comments on the refashioned pencil skirt I never wear, I'm also feeling more comfortable wearing this one. Stef had some wise words about that as well. He said that I have a potentially great style, but I sometimes lack the courage to actually take it on. This applies to the pencil skirts: they look great on me, it makes me stand out in a good way, if only I could become comfortable with wearing them. The solution to this would be to just put them on and get used to it. Because I really do see that it looks good, standing out just makes me self conscious. But wouldn't it be great to look good and feel good about that at the same time? To put this into practice I'm wearing the dressed-down version on the right today!


This time it's made out of a heavy double knit jersey. Which is already a lot more comfortable than stiff cotton. Another geometric print, in black and white so it can be easily combined with coloured tops. I didn't use a pattern, but started with two squares of fabric. I pinched them at the sides starting at the top, and then noticed that if you take in all the fabric at the sides, the skirt will hang down straight from the widest part of your butt. Which is not what you want: you want it to move towards your legs again so it curves around your butt. I figured out that you need to start pinning bottom up instead of top down to achieve this. And if you do, you notice that you get excess fabric at the top. Which is what darts in the back are for. MAJOR AHA-ERLEBNIS. I used to think that these darts were for people with bigger butts. Seriously. It's okay, you can laugh now.


For those who didn't know this either (probably no-one), I've illustrated the pin-direction and the way the fabric will fall when seen from the side with arrows, red being the wrong one, green the right one. Instead of darts I inserted an exposed zipper and took fabric in this way. Which is not a very good idea because then you get this extra fabric at the end of the zipper. But the damage was already done so I fiddled a bit with some thread to minimize the bulgeing. Another lesson learned. See, this is why I like to design stuff myself, patterns never explain why certain features are used.

Anyway, I'm happy with the skirt because the fabric is awesome and comfortable and although it's not perfect, it's good enough!

P.S. Last chance to enter the Giveaway, it ends tonight!

(15:60 #8)

Monday, August 6, 2012

Giveaway x 2!

To celebrate my 2 year Blogoversaire , I've prepared two packages for you to win! In accordance with the 15:60 challenge they're all made out of scraps. The giveaway is open internationally, and ends on Sunday, August 12th 0:00 CEST.

Both packages contain a matching tote and pincushion and some fabric!

Package #1
Package #2


The totes are lined with unbleached cotton so they can hold heavy things. These scraps are among the oldest ones I have. The dark blue ribbed bottom of pincushion #1 is the first fabric I ever bought. I hand sewed a top with it when I was 15! You might recognize the blue fabric too from Tilly's Loire Valley skirt. I once made a dress out of it. The bottom of pincushion #2 is a leftover piece from my yellow hoodie. The purple flowered and dotted fabrics are quilting cottons.


One is a yard by 60" of orange polka dot fabric with a light sheen. It's beautiful but white and orange do not go well with my pale skintone. The other one is a 45 inch by 1,5 yard fabric with golden threads woven through. I meant to make a button down shirt with this, but it's not really my style. Could be perfect for Fall!

If you'd like to win one of these packages, leave a comment stating:

1. which one you'd like
2. which garment from last year is your favourite (choose here)
3. and a way for me to contact you!

(15:60 #7)

Wednesday, July 25, 2012

Some Sleeves

You know what the problem is with stash busting? It creates more scraps! I'm trying to reduce both, but every time I make a garment, I am left with more scraps. And I know there are things like small purses or pincushions or headbands I could make, but one can only have so much of those. Hmmm...

Anyway, I've made a laptop sleeve for a friend. When I made my first sleeve, she asked me if I could make her one too. I said yes, she bought fabric. That was about a year ago. She bought a new laptop in the meantime. Moral of the story: never ask me to make you something :) At least there's one advantage: I learned to sew much better in the meantime. I finally made her sleeve last week. I needed a new one too, so I made another one with the leftover fabric to prevent my scrap pile getting higher.


The pink one is my friends sleeve. The outer fabric is a soft wool, the lining is a super soft and flowy something. This girl knows quality when she sees it! I handsewed the lining close to the zipper so it wouldn't get stuck. I also made an extra piece of fabric to protect her laptop from the metal zipper. And I used an extra piece of white cotton in between because the pink fabric is see through. It turned out well, but it was hard to combine a coarse zipper with such fine fabric. It took me about three hours to get it right! I made mine second, and was done in about half an hour. I used a smaller zipper this time, and a piece of quilting cotton from the scrap pile. There was no need for handsewing or an extra protection strip.


Doesn't the pink one remind you of an oyster or mussel? I used this tutorial for both sleeves, but omitted the iron-on fleece. If you choose the right materials, it's a fun half an hour project!

(15:60 #6)

Sunday, July 22, 2012

Summer Dress for Next Year #2

As predicted, I never got to wear the first summer dress I made last year. Even worse, I wore it only once this year. Nevertheless, I like the pattern and wanted to give it another go. Sadly, this summer is as bad as last years. I have worn the second version once in France but with my fleece jacket over it. Which kind of takes all the summer out of the dress... Anyway, unlike the summer, this dress is a better version of the last one!


The fabric is a kind of rayon I guess. I got it from the clearance section, and these pieces are never labeled. Pff, half of the fabric on the racks isn't even labeled. Another reason to dislike the local fabric store. Anyway, I used the patterns from last year. They were quite horrible! I didn't transfer the adjustments I made in the dress to the patterns, but I could remember some of them fortunately. I did not use the slippery stretch fabric, but a soft white cotton as a lining. I gathered the bust again but moved the gathers a bit inwards, and used a dart in the lining because it might become to bulky if you gather both. I also added some length to the dress.


This dress is easy to finish because of the way it is put together. You start at the bust pieces and work your way down (or up when going towards the back), so all your seams allowances will automatically fall between your fabrics. I made this in France too, so I had the lots of time to be precise and not take shortcuts. It took me about 5 days from cutting to finishing. It's nice to see that I was proud of the way I finished it last year, while I've done a much better job this year. You can't but learn a lot in a year! I only hope I don't have to wait another year before I can wear it...

(15:30 #5)

Thursday, July 19, 2012

The Perfect Blouse

I am proud to present to you: the best thing I have made - EVER.


The pattern is Burdastyle 7/2012 132. It's been a long time since I made something from a pattern. I was a good girl and followed nearly all the instructions, did not take shortcuts, and made the inside look as pretty as the outside. All the seams are flat felled and topstitched. I made my first plackets and they turned out great! I was a bit scared of them at first, because the Burda instructions were completely unclear. They could have been written in Chinese for all I knew (I was going to say Klingon first. I've been watching too much Big Bang Theory). So I used Peter's instructions for the Negroni plackets to understand how they work. It was not so hard after all!


I can't tell you how happy I am with the result! The stitching is neat, the buttons evenly spaced, it's a style that has been on my list for a long time, the fabric is fun and great for summer and perfect for this pattern, it was only 3,- and it hardly creases. It can also be worn both with rolled up and long sleeves, loose for casual purposes and tucked in for work. White is still a bit tricky though. Half an hour after finishing I cut my hand and almost bled all over the shirt. The next day I spilled sateh sauce on it. I don't even dare to drink red wine or eat pasta sauce when I wear it...


I can see now what no stress sewing does for the quality of your endresult. I had ten days off, with nothing else to do but sew. I sewed this shirt in three days, sewing about 4 hours a day. Normally I just have one day and I like to get something finished at the end. 4 hours a day is ideal though, and now I've seen what a difference it makes not to be in a hurry, I might just take more time from now on.

What is the most perfect thing you've ever made?

(15:60 #4)